64 Campus Lane
Lyndon Center, VT 05850

WEBSITE EDITOR BASICS
Getting Familiar with Your New Website Editor
The editor's interface has three main predefined sections: The top navigation bar, the left panel, and the content area. Each of these predefined sections plays an important role in letting you make your site as professional and user friendly as possible. On this page we will go over the three predefined sections.
Video Training Resource
Getting comfortable with the tools to edit your site is very important. Here we show you around so you know more about how to navigate through your editor so you can build and customize your responsive site.
Learn about great features for customizing your site and widgets you can add to give your site more functionality.
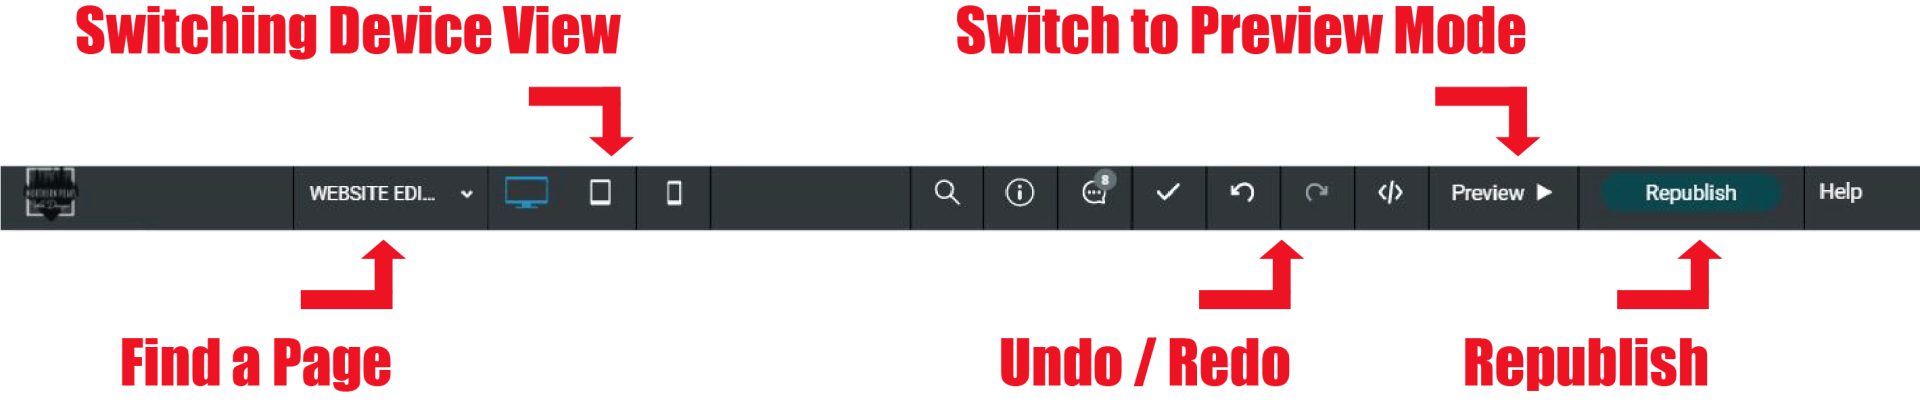
Top Navigation Bar
Use the top navigation bar to navigate your site, both by moving between different pages and by moving between different device views. Click a page to view it, or click a device to see how your current page looks on that device.
The navigation bar has controls to undo or re-do simple actions in the editor, save your current site, and preview or republish your site. The top navigation bar also has an indicator for when changes in the editor are saved.

Left Panel
The left panel contains all of the widgets and available features within your site editor. Here is where you can find tools to edit almost anything on your site.
The left panel has features to make broad, sweeping changes to the entire site. For example, you can change the color scheme or button design by going into the Design tab, add new features and widgets with the Widget tab, change your pages' configuration in the Pages tab, and make administrative changes in the Settings tab such as changing the site's URL. (image to the left for reference)
Content Area
The Content Area is where you can move or add any of the widgets/items available within the site editor. To adjust a currently added widget on your site, simply hover over the item you want to make a change to and then click on it. This will bring you to a section in which you can change them. The content area allows you to change images, text, edit and delete buttons, and more.
In-Editor Help
For help about certain functions in the editor, click the gray question mark at the top right of the screen to open the in editor help for information about what the feature can do. (image to right for reference)

IMPORTANT NOTES:
- If you go into the site editor and see a red bar at the top of the screen, this means someone else is currently editing the site. It is not recommended to have more than one person editing at a time. If you decide to still edit while someone another individual is also editing the site, you will want to reach out to them before hitting the republish button to confirm their site changes are also okay to go live.
- Once you have created a new page or section on the site, be sure to switch device modes to make sure the layout works okay on mobile and tablet before you hit the Republish button. Sometimes to get the layout perfect on all devices you will need to copy rows, sections, or widgets and adjust them specifically for a device. When you copy site elements you will want to make sure you have hidden the adjusted duplicate on the other devices.

Website Designed by Northern Peaks Web Design